
In early 2015, we released video tutorial website for domain and hosting. During this time, it helped many to save money and test their strength in practice. In this video tutorial, we have shown clearly how to install a ready-made website purchased in our store on a domain and hosting.
It’s time to expand the instruction and make it a text version.
In this lesson, we will tell you where to start and go from the very beginning (from the moment you download the purchased site in the store) to the full launch of the site.
Let’s get started!
The content of the article
Preparing for installation
Before we start installing the site we need:
- Purchased website
- Domain
- Hosting
For a long time, we have been releasing various lessons related to buying a website, choosing a domain and hosting, and much more.
Now we will try to put it all together.
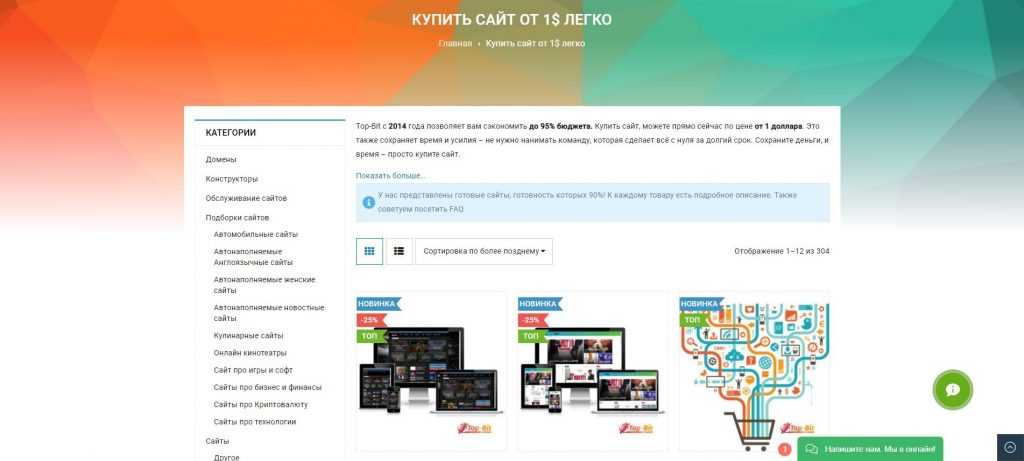
Choosing and buying a site
In order to start any installation, you will need to buy a site, or you must have it already purchased and available for download. We revealed here.
Selecting a domain for the site
Next, when we already have a website, we need to choose a domain. Regarding domain selection, we have also published many articles and tutorials. Previously, this could be done through our child service, but we recently closed it and still decided to stop at a partner that has been proven over the years.
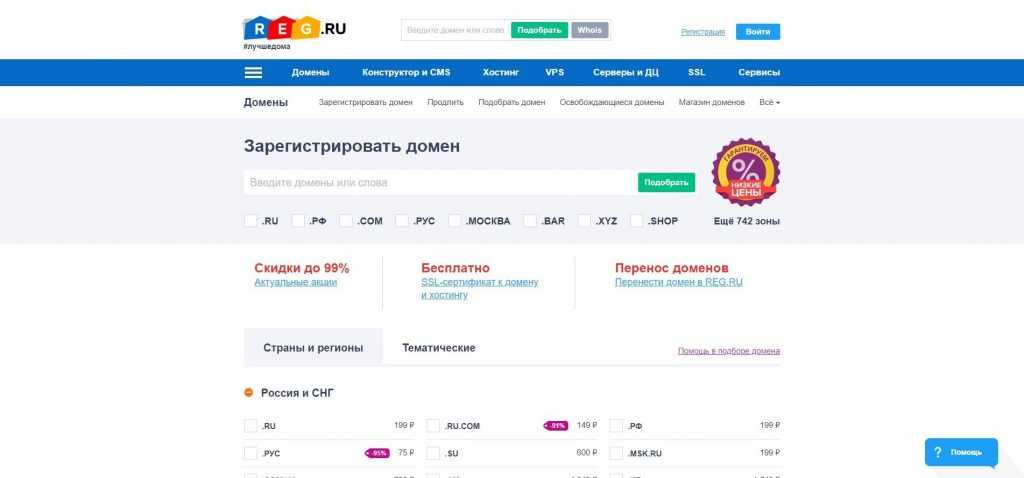
You can choose a domain from our partner Reg.ru. There is a wide choice of domain zones and reasonable prices.
And for our clients, we give a promotional code for registering a domain and hosting on Reg.ru.
B1A5-D955-9A17-D54B
After you have chosen and bought a domain name for your site, you need to order hosting.
Choose hosting for the site
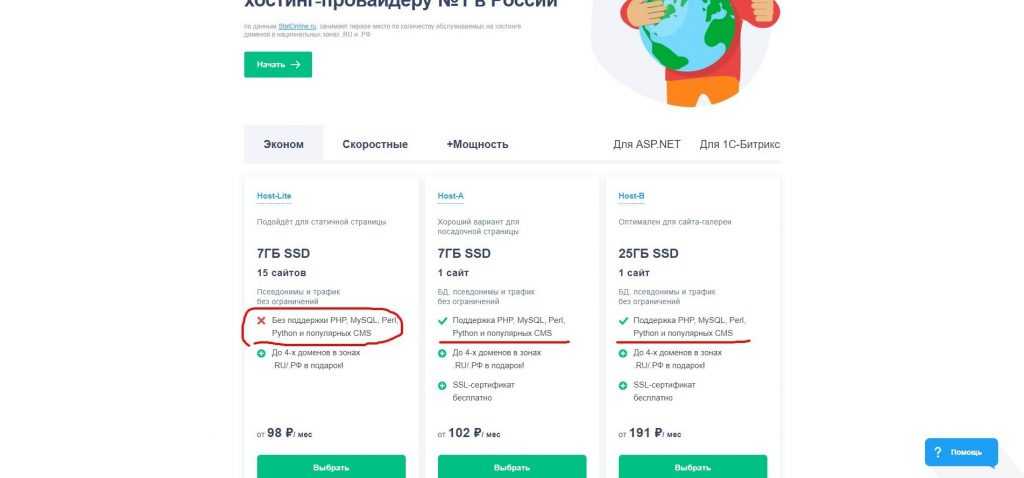
We also wrote a lot about the choice of hosting. We can order it from any hoster, just like a domain.
We will consider as an example, again, our partner Reg.ru.
When choosing a hosting, it is important to pay attention to the following:
- Server must be on Linux
- Must have DB support
- Must have PHP support
Next, you are already looking at the availability of space, the number of sites that can be set and other limits.
Reg.ru offers 3 hosting management system options
- ISPmanager
- Cpanel
- Plesk
We recommend using ISPManager. Further on it will be instructions.
By the way, the promo code above is also valid for hosting.
Linking domain and hosting
It often happens that a domain is bought in one place, and hosting in another. In order for everything to work correctly, you need to link them using DNS records. detailed instructions will appear later, but for now we will try to show on our fingers.
Each hosting gives the user its own dns. Often you can see them in your personal account with the host or you can just ask the support.
Each domain and domain registrar allows you to change or register the necessary dns through your personal account and domain management.
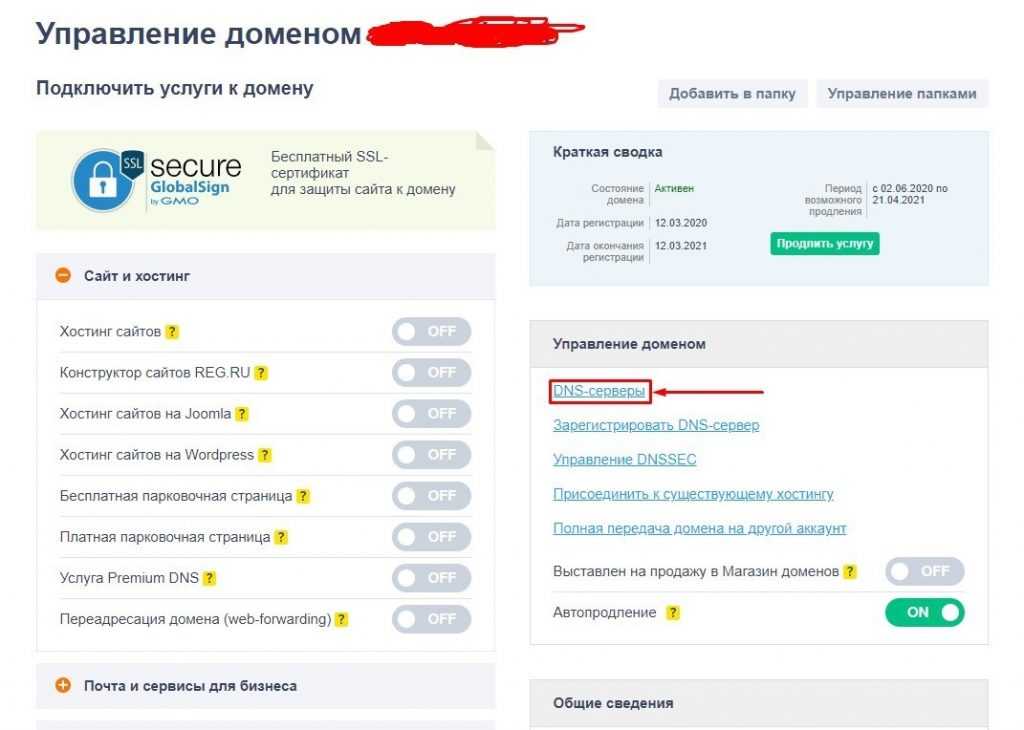
We take the dns provided by the hoster and set them in the domain settings.

After you have registered the DNS, their connection (DNS delegation procedure) must go through. The total time of dns delegation is from 3 to 72 hours.
If the domain and hosting are taken from the same company, then the procedure can be reduced to an hour.
Now we have a website, domain and hosting, and we can proceed directly to the installation process.
Installing the site
We start the installation process by downloading the site to a PC and unpacking the archive.
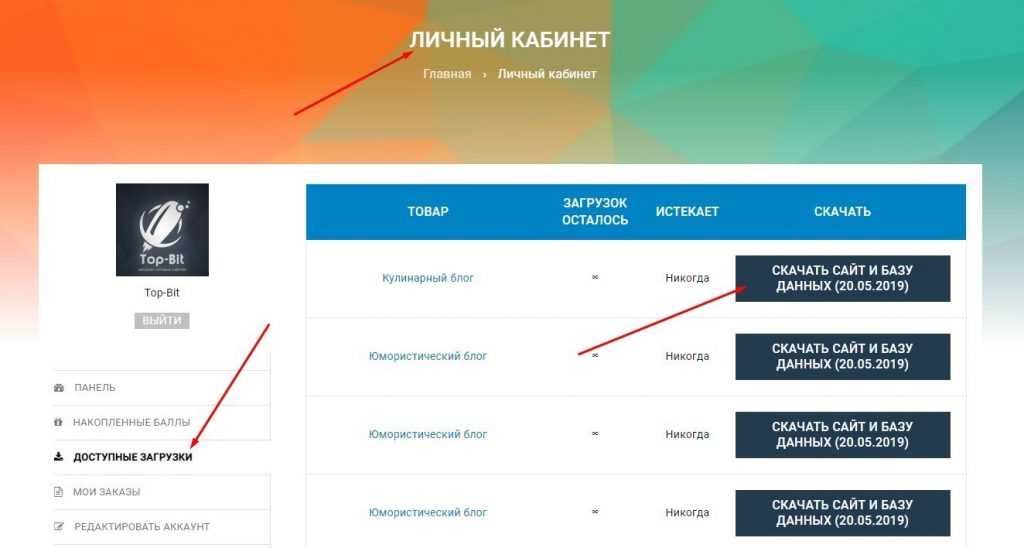
After downloading, you will receive an archive file. It should be unpacked and in it you will see a database file and an archive with the file system of the site.

The database (.sql file) is ready for import, but we recommend that you immediately prepare the file system, which, ideally, should be unpacked right away.
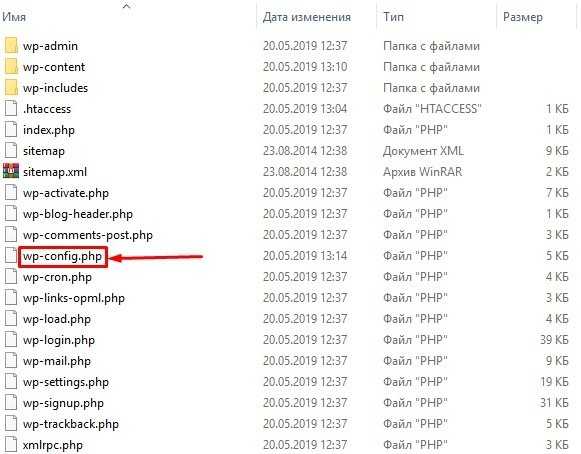
now our site is almost ready for installation and then we go to the already ordered hosting and first of all create a database.
Create a database
To create a database, you need to go to the hosting and find the section where you can create a database. In ISPManager it’s Home – Databases and then above the list click Create.

After that, a new window will appear where we specify the database data, namely:
- Database name
- Username
- Password
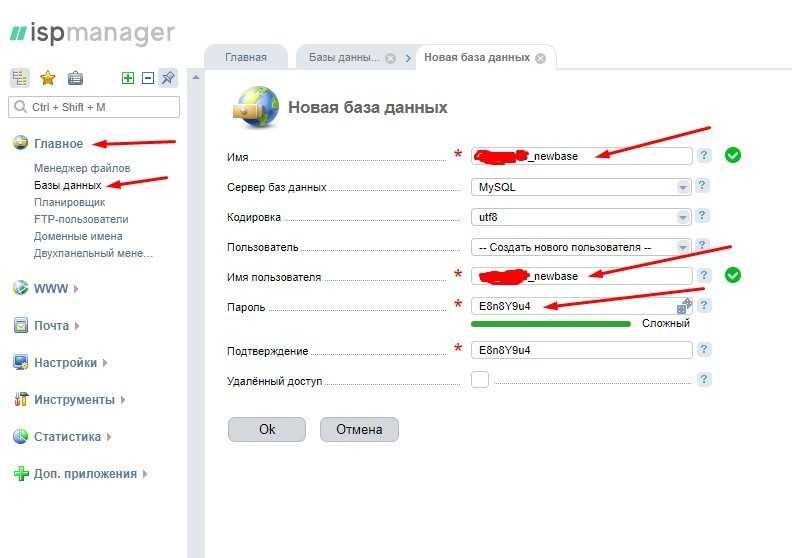
We save this data, since it is ideal to write it right away in the wp-config.php file (see the screenshot above), which is located on your PC in the unpacked file system.
In order to make changes it is important to use a program Notepad++. In no case do not edit the file through a regular notepad. This violates the file encoding and in the process the site will not work correctly for you.
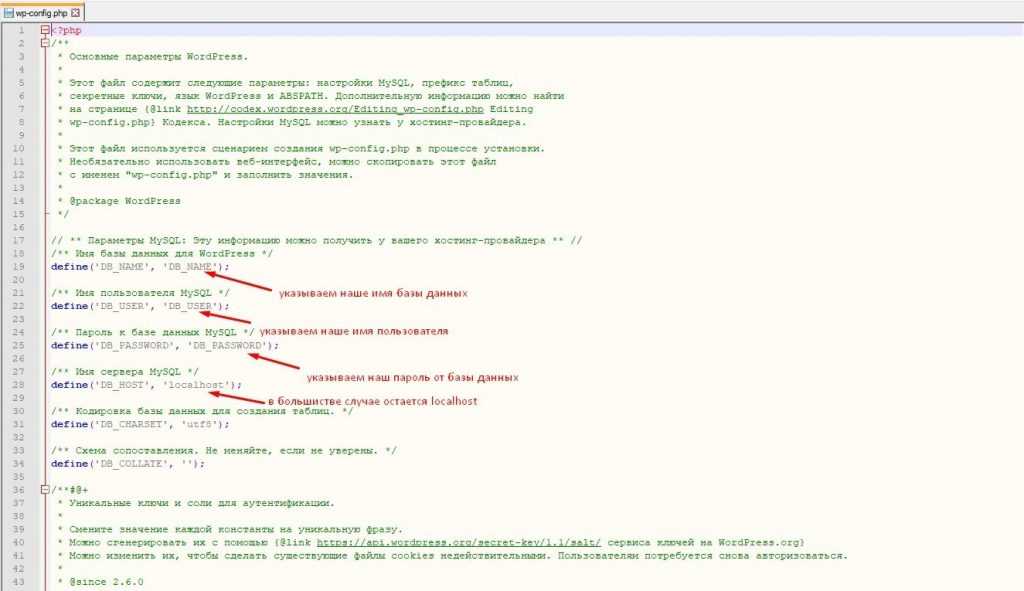
Pay attention to the directive
/** MySQL server name */
define(‘DB_HOST’, ‘localhost’);
Often it remains localhost, however, some hosts store the database on a separate server from the site itself and you need to specify the database server that your hosting provides (you can check with your hosting support for details).
After we have written all the data for connecting to the database, we need to import and configure the database itself.

In order for us to be able to import information (DB) that was in the archive into our database, click Go and get into PHPMYADMIN.
Import Database
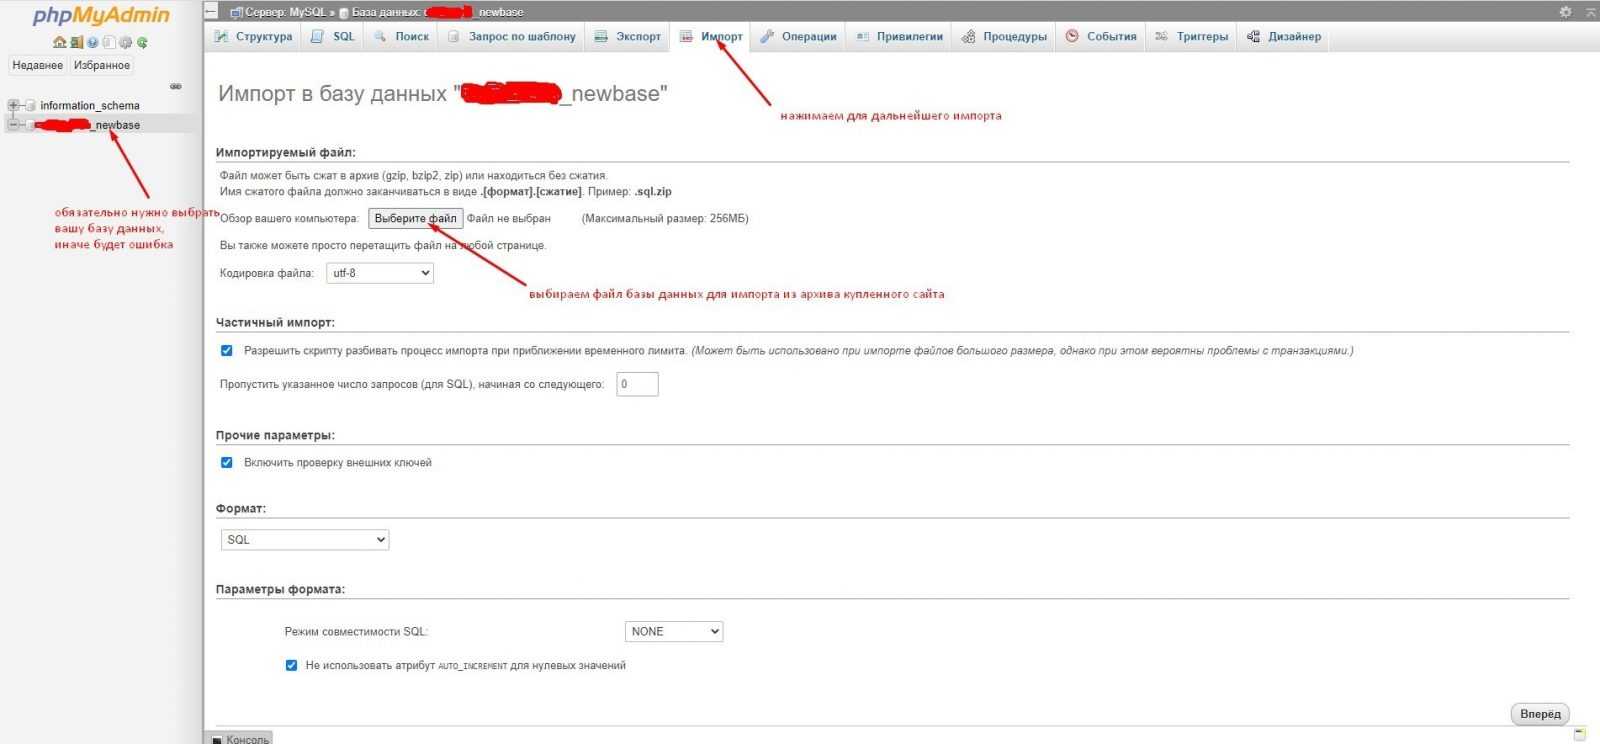
After importing the database, you should have all tables displayed as in the screenshot below.

Next is one of the important steps after import and here you need to be very ATTENTIVE !
After importing the database, immediately go to the wp_option table and pay attention to the line with the site address (shown in the screenshot above). This is the demo address. If you do not change it, then all links will lead to the demo.
To replace ALL URLs correctly you need to write 3 SQL queries.
UPDATE wp_options SET option_value = replace(option_value, ‘http://olddomain.com’, ‘http://newdomain.ru’) WHERE option_name = ‘home’ OR option_name = ‘siteurl’;
UPDATE wp_posts SET guid = replace(guid, ‘http://olddomain.com’, ‘http://newdomain.ru’) ;
UPDATE wp_posts SET post_content = replace(post_content, ‘http://olddomain.com’, ‘http://newdomain.ru’) ;
Where http://olddomain.com you change to the domain address specified after import in the wp_option table, and newdomain.ru you change to your domain on which you installed the finished site.
In order to write these SQL queries, you need to again select your database (and not a specific table) in the left column and then click on the SQL tab. All requests must be written one by one and all characters and symbols must be taken into account.

The database is ready and now we can start uploading files.
Upload site files to hosting
There are two options for uploading files to the hosting:
- Via FTP
- Via hosting file manager
The second option will be easier, but not always suitable.
In the first option, you will need FTP access through which you can access the server through special software (for example, FileZilla) and download the necessary files.
We will not go into details and will consider the second option with an example. And let’s start by preparing the archive with the files.
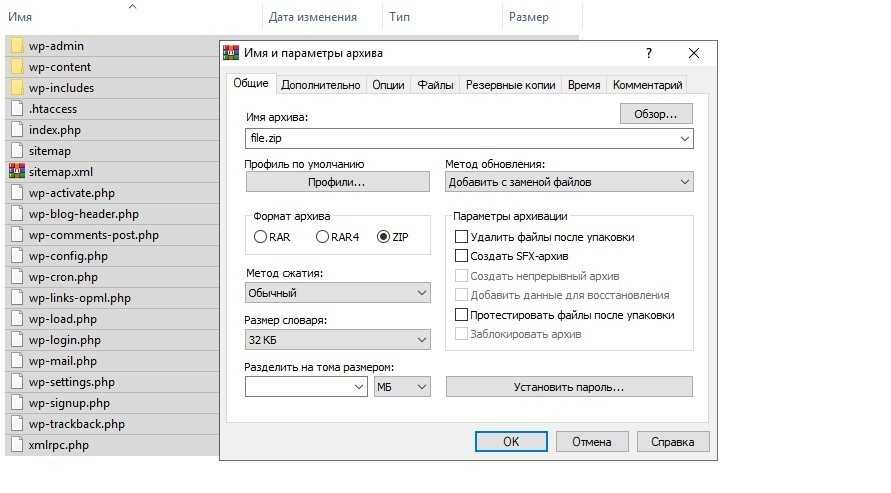
Next, on the hosting itself, you need to go to the hosting File Manager and find the root directory. If you install the site on ISPManager, then you will have a www folder in the root, and in it there will be a folder with the name of your domain. We go in there and clean everything up. Next, load our archive.
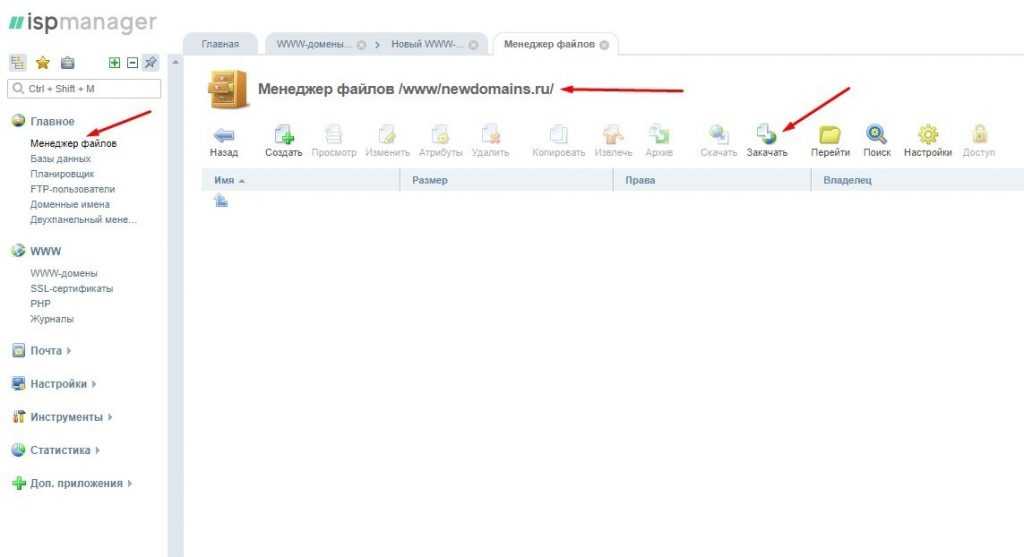
After downloading, you need to unpack it so that the index.php file is located exactly in this directory.
That’s it. Now you have the site installed and if you did everything correctly, you can already go to your domain and check the work.
Output
The installation process is not as complicated as it seemed, but there are many pitfalls. We tried to chew in detail the entire process of installing a site on a domain and hosting, but often we are unable to take into account a lot.
If you have problems, write in the comments or to our support and we will definitely help you figure it out.


